There is a lot of healthy movement online at the moment on the topic of unrealistic expectations of beauty. There have been public calls for transparency in regards to the digital manipulation of images used to present ‘beautiful’ women in advertising. Delightfully Tacky wrote a great piece on it over on her blog here, with some great example images. Her examples include ribs, rolls, thighs and size all being erased in order to prepare an image for public consumption.
I’m a supporter of the push for transparency in this imagery, so I think it is appropriate that I show honesty about my images too. It is important to know what to expect when you’re looking at my pictures and what I will or will not adjust using image editing software.
Most people refer to digital image manipulation a ‘photshopping’ a picture. I tend to edit my pictures in bulk and for that the Photoshop program is too much work to process the images. I don’t do them one at a time, I do them 30 at a time. Adobe offers a more lightweight, batch editing photo program called Lightroom which suits me for this purpose perfectly.
Firstly, let’s talk about what is off limits for me. I will not, ever, use a digital image manipulation program to remove: wrinkles, cellulite, thighs (no false gaps here), rolls, bulges. There’s a lot of work that goes into these things and when I’m editing a lot of pictures, it’s not even worth entertaining the thought of doing photo edits like this as it would take up too much time. I prefer my photos too look as natural and polished as I can.
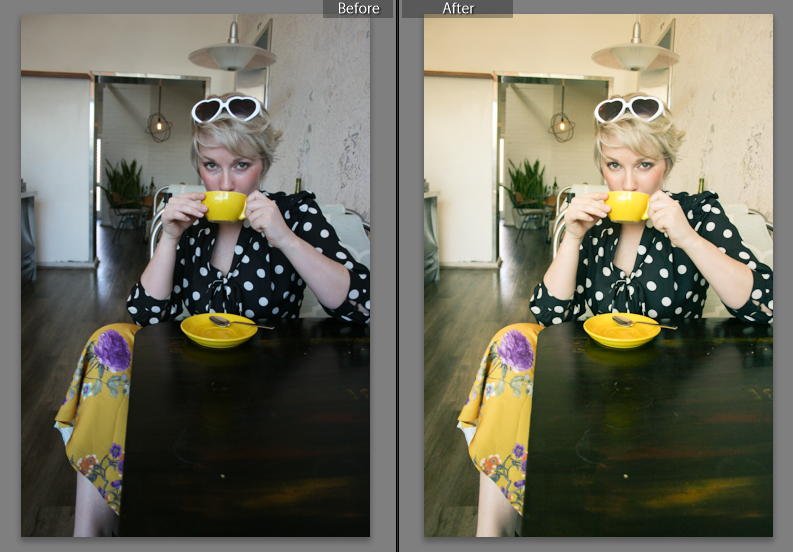
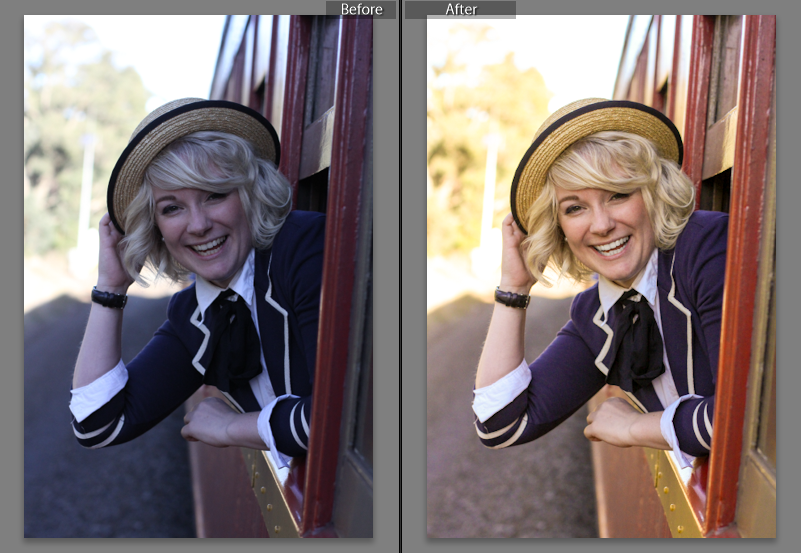
Things I will do with pictures: remove huge bags under my eyes. Here’s an example below in which lighting and angle combined to make me look like I was making a coffee commercial playing the role of coffee addict.
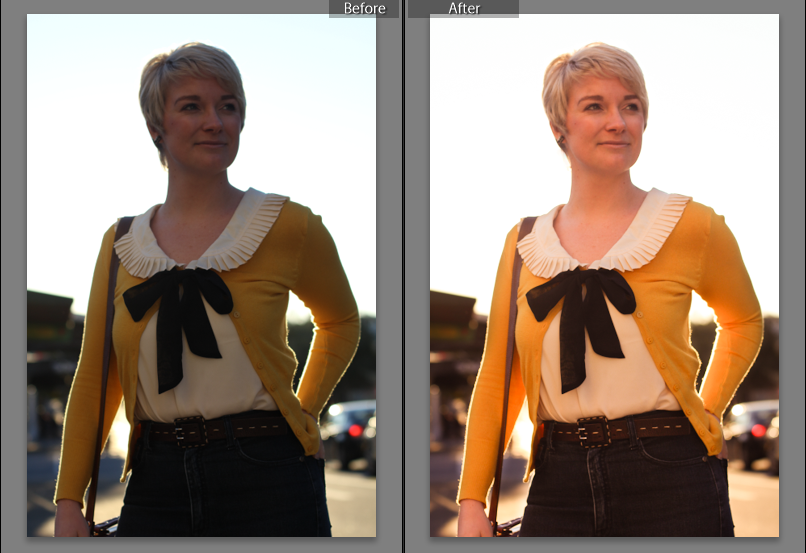
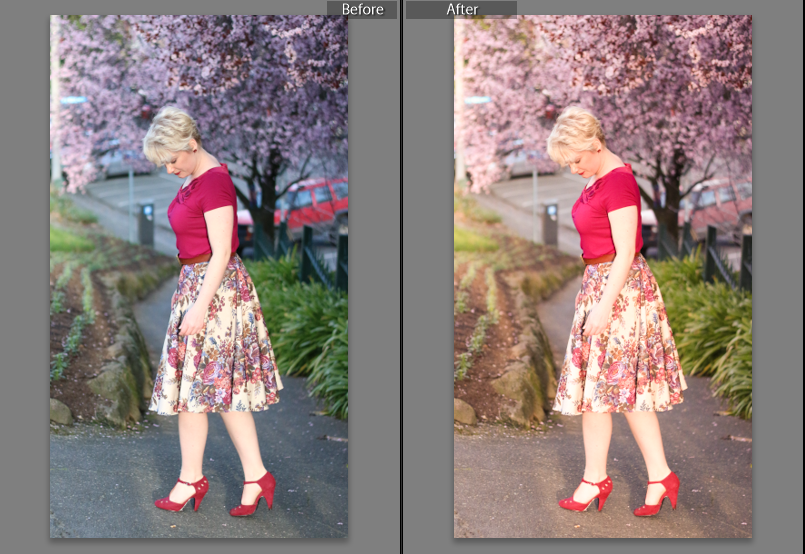
You have probably noticed the difference in colour and brightness as well. When I process the images I also adjust the exposure levels, colour vibrancy, and temperature of the picture. The above picture has been lightened and made warmer. Below is an example where I had to lighten the foreground only.
In the next one, I’ve cut out my mullet. I didn’t have time to get a haircut before getting these pictures taken, so I had to work with the the images we captured.
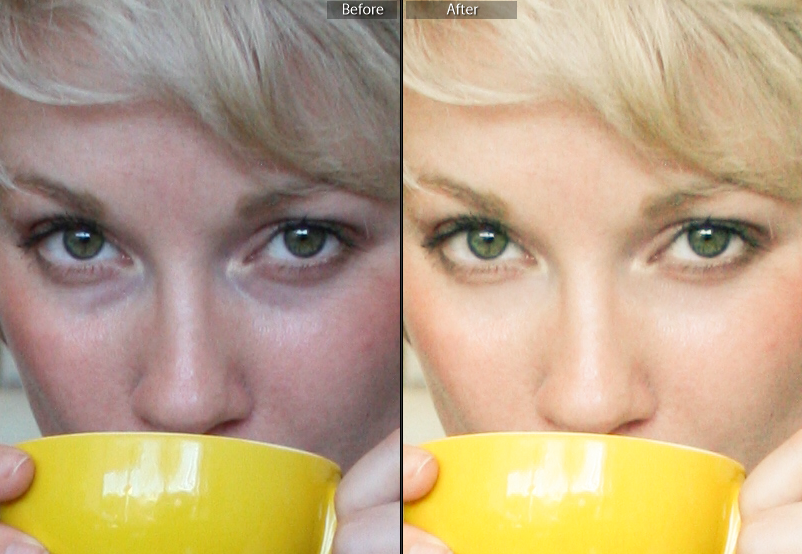
The below picture is an example of teeth whitening and removal of under eye circles. You can see the difference in hair colour. My extremely yellow hair is testament to how yellow my teeth became when I made the image ‘warmer’. It was also more noticeable because of the red lipstick, so I toned my teeth down to a more natural colour.
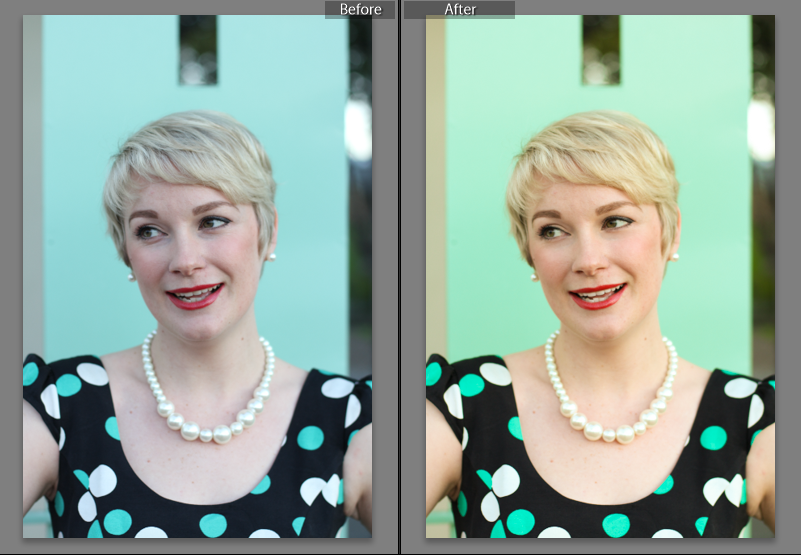
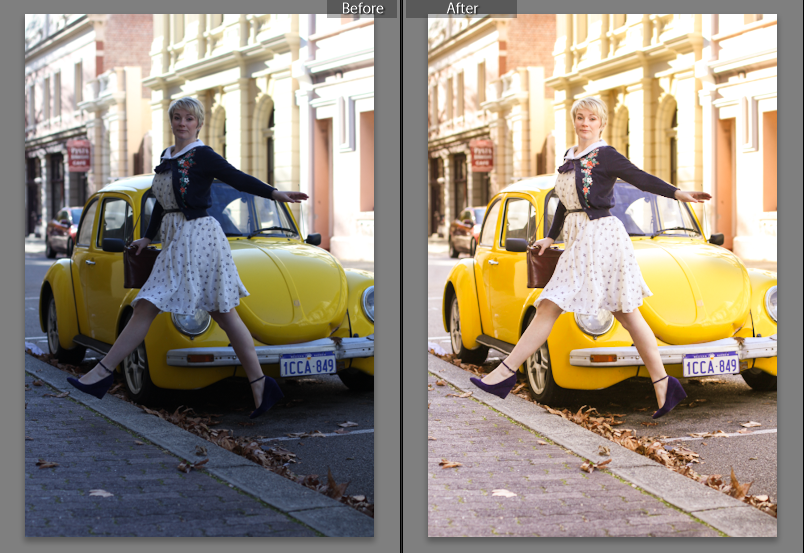
Above is another example of teeth whitening for similar reasons. See how much more yellow my hair is in the warmer picture? This means my teeth where really yellow in the image as well. Below you can see that I have blended a red car into the background by making it less bold. I have previously removed prominent street signs as well.
In short, I can remove pimples, eye circles, ugly things in the background or on the streetscape, yellow teeth, loose strands of hair. In some instances I may reinforce my eyeliner or mascara, especially if the photos are after and long day and my makeup has worn off. I never add longer lashes or darken my skin (I know I’m pale and it has taken me years to learn to love it).
If you ever see an image on my blog and you want to see what I have done to alter it, you are always welcome to comment and ask me.
My mission is to create beautiful, inspiring and emotive images, not images that make people ashamed of their body. If you have any questions about this content, I’m happy to talk to you about it 🙂
-L
